Trim is an essential part of every room as a finishing touch. Most often found at the bottom of a wall where it meets the floor, it can also be around doors, windows, at the top of the wall or even as decoration in the middle of a wall.
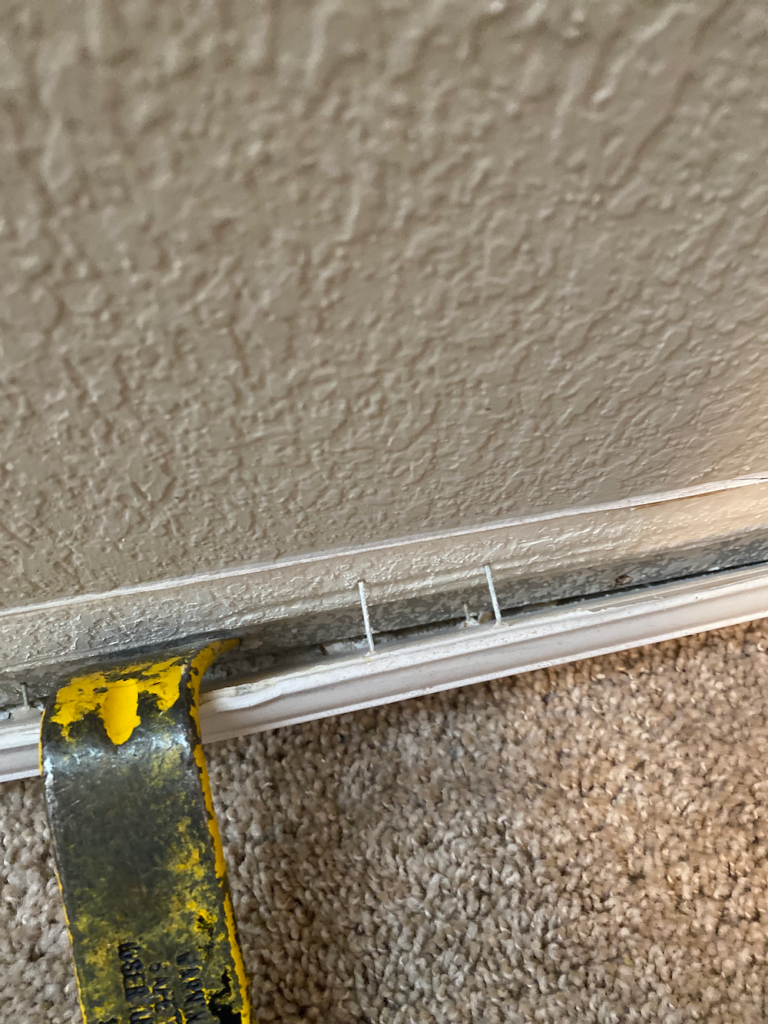
Removing Trim is most easily accomplished by using a utility knife to cut the seal between the trim and the wall, then gently using a 3-inch metal scraper between the wall and the trim to separate it and pull it from the wall. Additionally after the scraper is inserted, a metal pry bar or trim removal tool can be used to as well.
It may be necessary to remove trim to paint, replaced damaged pieces, or just change the trim out to create a new style. Removed trim can be cleaned up and reused, or it can be recycled or discarded.
Removing Baseboards Without Damage
There are several steps to follow to remove baseboards without damage. It is important to not rush, and work carefully, because your wall may be made of drywall which can be damaged with some of these tools if used improperly.
Here are the basic steps to remove baseboards:
- Score caulk or paint between baseboard and wall
- Insert Putty Knife between baseboard and wall
- Work in prybar or trim removal tool
- Lever tools to release from wall
- Pull one end free
- Work down length to remove entire piece
- Remove nails
Score caulk or paint between baseboard and wall

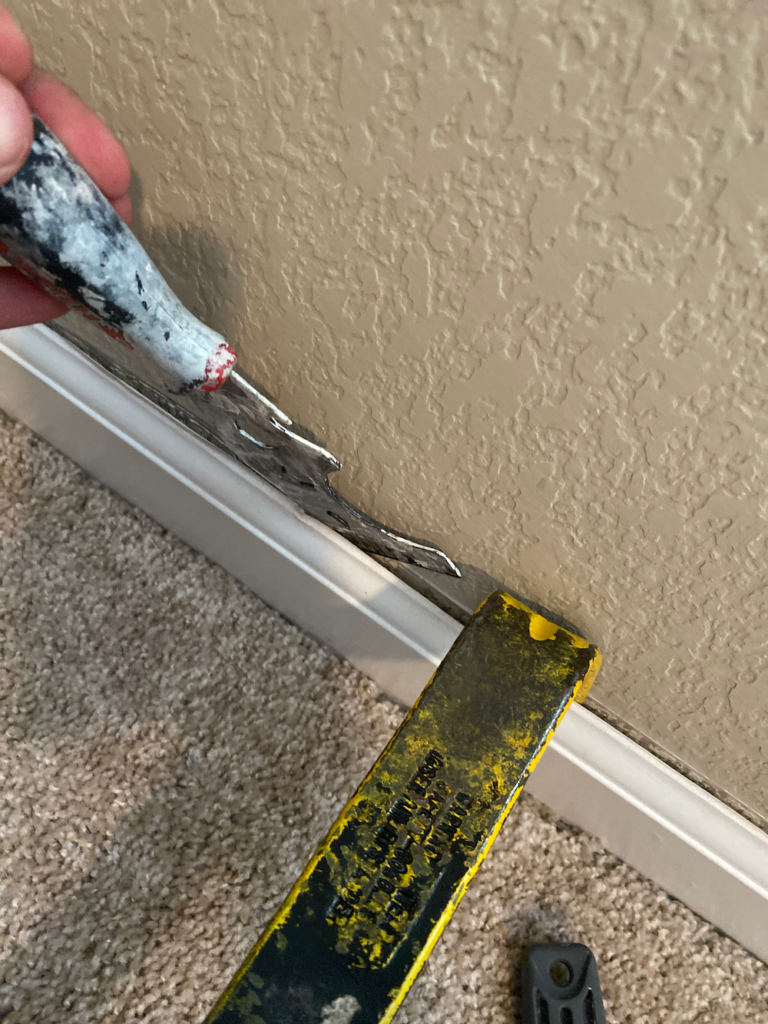
A sharp utility knife or razor blade should be used to break the seal between the board and the wall. The trim usually has a bead of caulk or paint that connects it to the wall that needs to be cut so that when you remove the piece it won’t pull the drywall with it and create a tear.
Depending on the seal (and the sharpness of your blade), you may need to make several passes with the knife. If you don’t get the knife through the caulk in the first pass just make multiple scores with the knife parallel to the wall.
Use caution so you don’t slip and cut in the wrong place. Work along the entire edge from one side to the other to release the entire length.
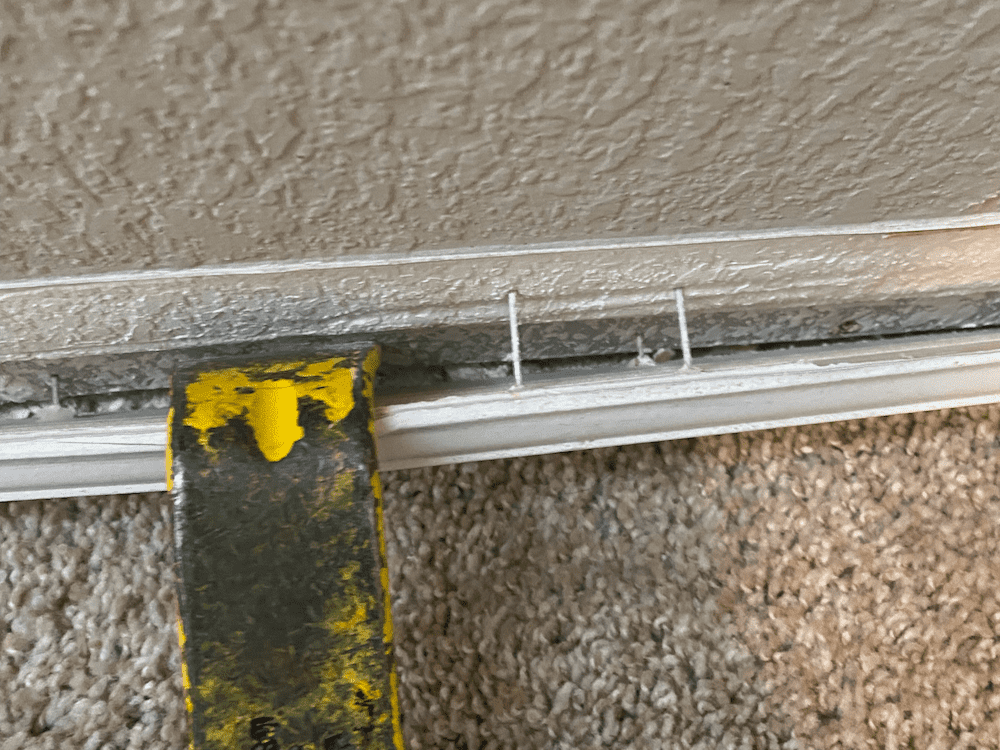
You will know when you get through the seal because the effort will be reduced, and a small gap will appear that is just big enough for a putty knife to go into.
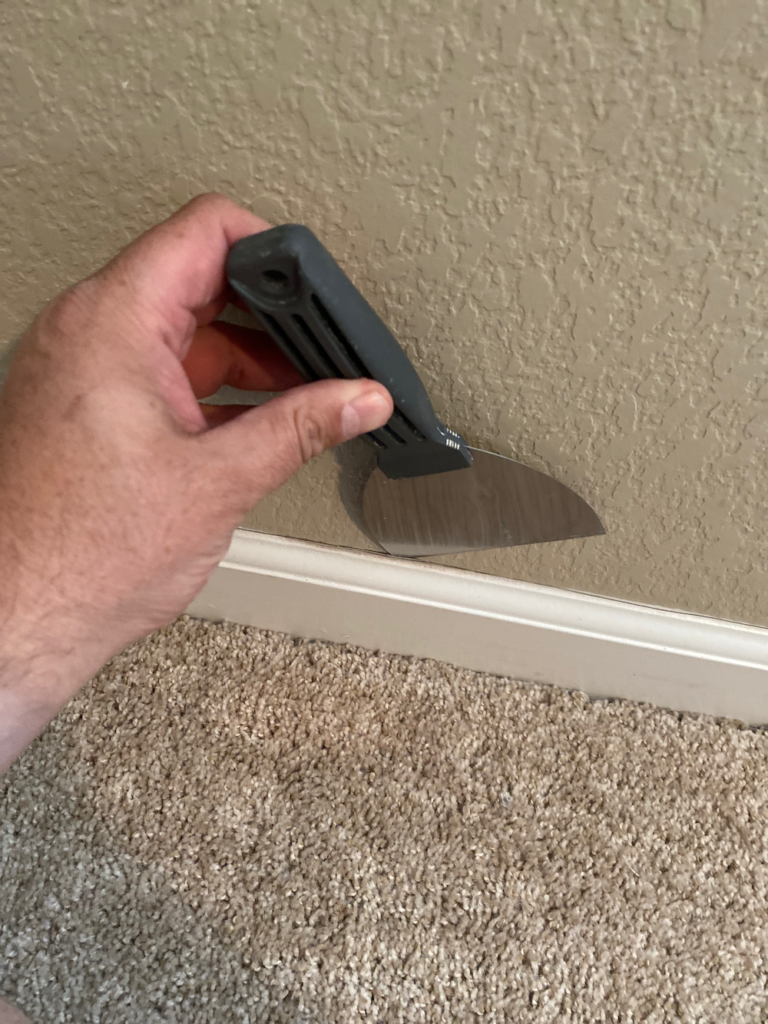
Insert Putty Knife between baseboard and wall
Once you have cut the seal along the entire board, start in the middle (between the two ends). I like to start in the middle because the edges may be mitered at an angle and this can be harder to remove.
Slide a wide, flat metal putty knife between the wall and the trim. This works works best because it is thin enough to slide between the wall and the board and create a larger opening for the next step.
If the trim piece seems to come loose with just this step, that’s great – carefully wiggle it back and forth until it pops off the wall.
If it doesn’t, then…
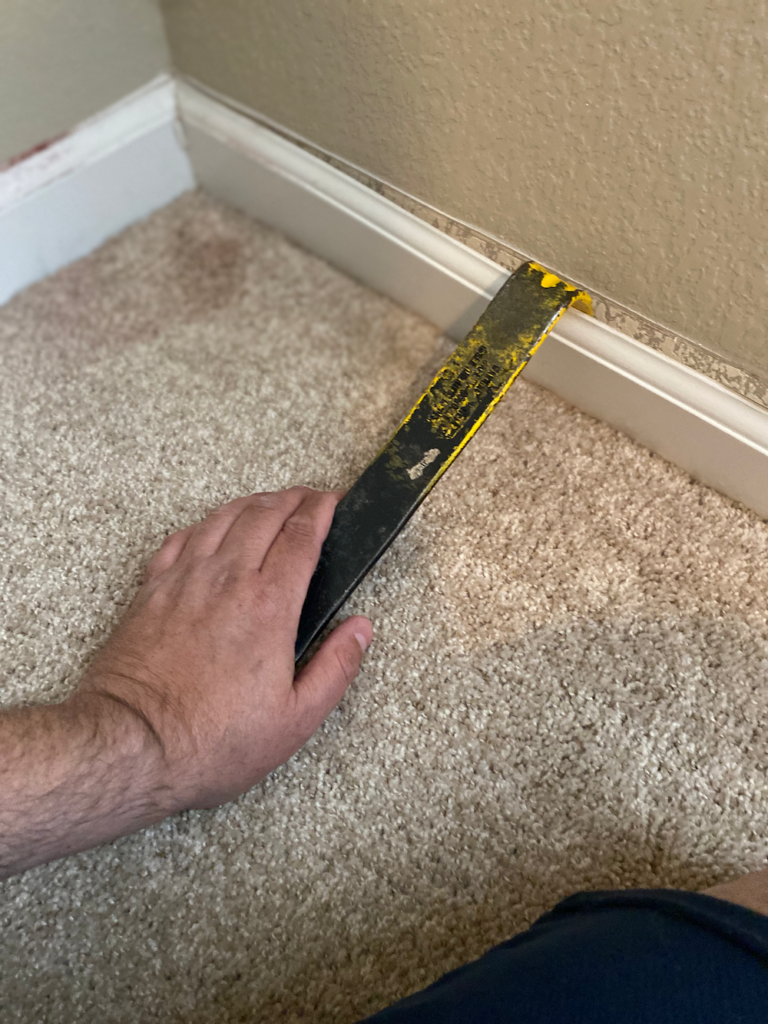
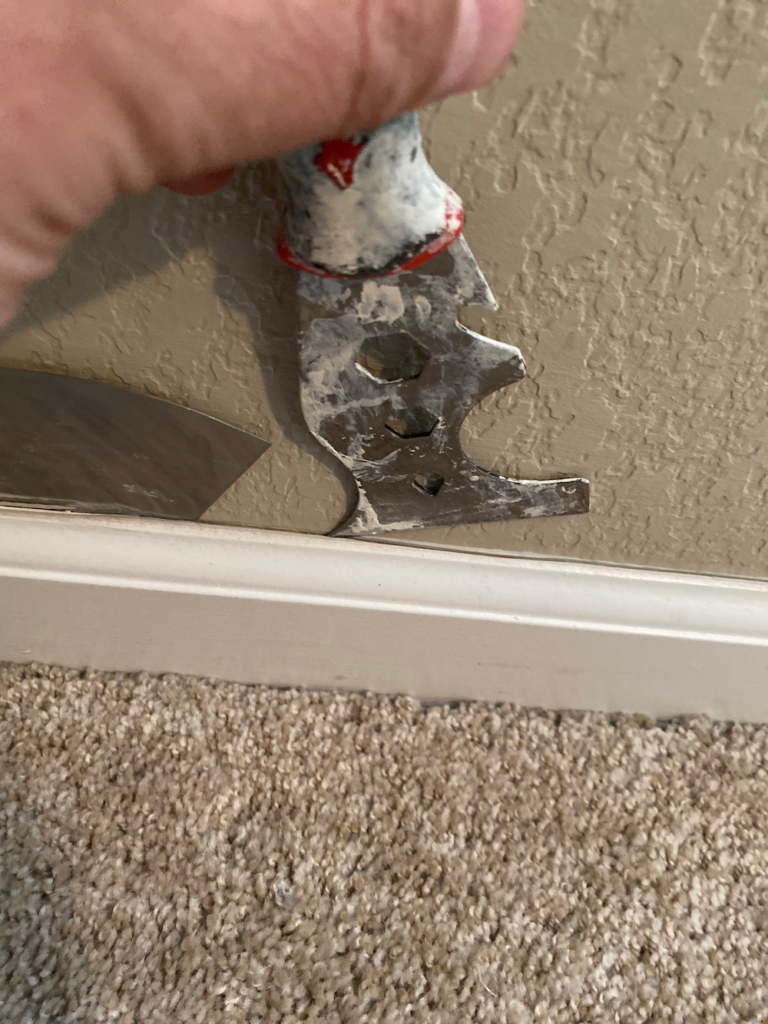
Work in prybar or trim removal tool
I like to use a prybar (some call it a crowbar), as the next step. it is a little stronger, and thicker and is the “next step” in opening up the gap. But be careful. It is very easy with this tool to damage the drywall.
When you slide in the prybar, the increased leverage can easily damage the wall, especially if it is drywall. So either be very careful, or use the metal putty knife as a shim to spread out the force and protect the wall.
Alternatively you can use a trim removal tool, or a Painter’s tool. They aren’t as heavy duty as a prybar, and work very well to remove Trim.
Lever tools to release from wall
After you have broken the seal all along the trim piece or baseboard, use the tools to release the trim from the wall. Usually it is nailed in so be careful. Sometimes just a few nails hold it in place, but other times there can be lots – it just depends on who was putting the piece in.
Helpful hint: When using the prybar press down, don’t lift up. This way, if the bar does damage the wall, it will be hidden behind the trim when you re-install it.
Pull one end free
After a while of sliding in the tools and levering them back and forth you will have enough play in the trim to pull it loose. Getting one end free is the hardest part, so once you have that done, you can…
Work down length to remove entire piece
After a section gets free, and you know it will, carefully pull it away from the wall, and up from the floor to get the rest free. Be careful for the nails that are sticking out.
Remove nails
Finally, use a nail pulling tool to take out the nails. Either for safety, or so you can reuse, or recycle the piece. If you don’t have a nail removal tool, I have use channel lock pliers to pull out the nails.
Removing Trim Without Damaging Drywall
The hardest part of removing trim is keeping the drywall undamaged. But there is a secret.
Use a metal putty knife. Specifically a 3-inch or even 4-inch one. If you put the flat metal part up against the wall, you can apply more pressure with your prybar or trim removal tool, and worry less (but still a little) about damaging drywall.
If you do damage the drywall, it isn’t hard to repair, but does take extra work and materials. Just work slowly and carefully and you reduce your chances of damaging it.
Other Options
Here are a few other things people have asked me about trim and painting and stuff.
Should you remove baseboards before painting walls?
It isn’t entirely necessary to remove the baseboards before painting walls.
If you want the wall behind the baseboard painted, then, yes, you will need to remove them.
A reason I took them off was because I was installing Wainscot on the lower part of the wall. But I was very careful in removing them because I wanted to put them back over the new Wainscot boards. Personally I wasn’t worried about painting behind them.
If you want to leave the trim boards in place you can use painter’s tape to keep them from getting paint on them, or if you have a steady hand and good technique, you can even cut the paint in right next to the trim without getting it in the wrong place. I drink way too much coffee to do that.
Can you Remove Baseboards and Reuse Them?
I actually removed my baseboards so that I CAN reuse them in the same room. The key is to be very careful when taking them off so they don’t crack or get any marks on them.
If you do get marks or scratches, you can sand and use wood filler to repair the damage.
Best Tool for Removing Baseboards.
The tools Needed to remove trim are very common. You probably have at least half in your collection somewhere.
Final thoughts
My Snoring Room is about 150 square feet, and I had all the baseboards removed in about 30 minutes. It took about an equal amount of time to pull the nails out. But I didn’t damage the wall, because I took my time and used the proper techniques described above. And you can to!